
In the digital age, managing online education efficiently is crucial for both educational institutions and businesses. LMS Scholar is an advanced Learning Management System (LMS) designed to simplify online learning by providing a powerful platform to manage courses, track progress, and enhance learner engagement. Whether you’re an educator, corporate trainer, or student, LMS Scholar offers a user-friendly solution to meet your e-learning needs. This guide will walk you through how to prepare your Learning Management System LMS A-Z on your PC, ensuring a smooth setup for seamless operation.
Step-by-Step Guide to Preparing LMS Scholar on Your PC
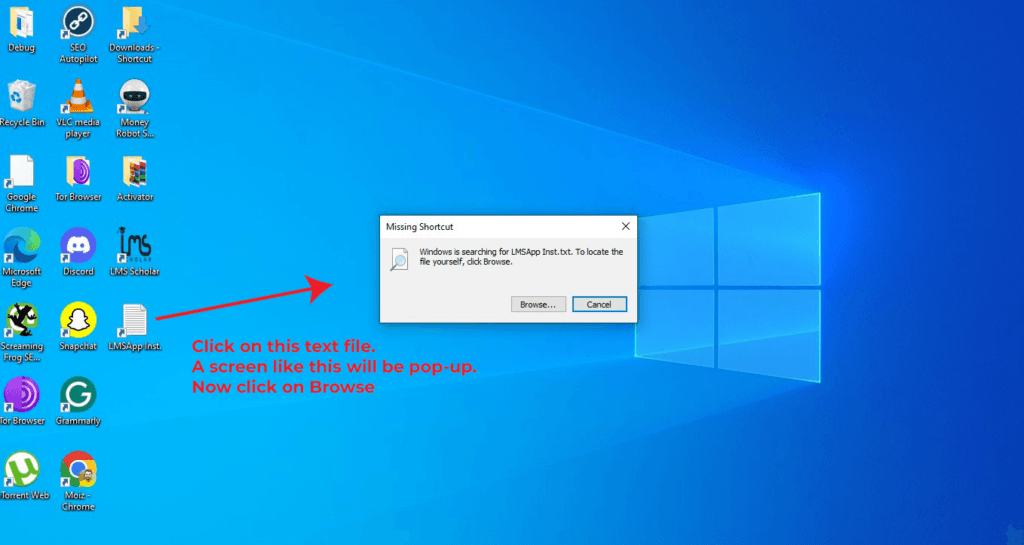
Step 1: Open the Text File and Browse for Prepared File
Start by clicking on the text file provided in your LMS Scholar package. Once you click it, a screen similar to the one shown below will pop up. On this screen, you’ll see an option to Browse – click on it to proceed to the next step.
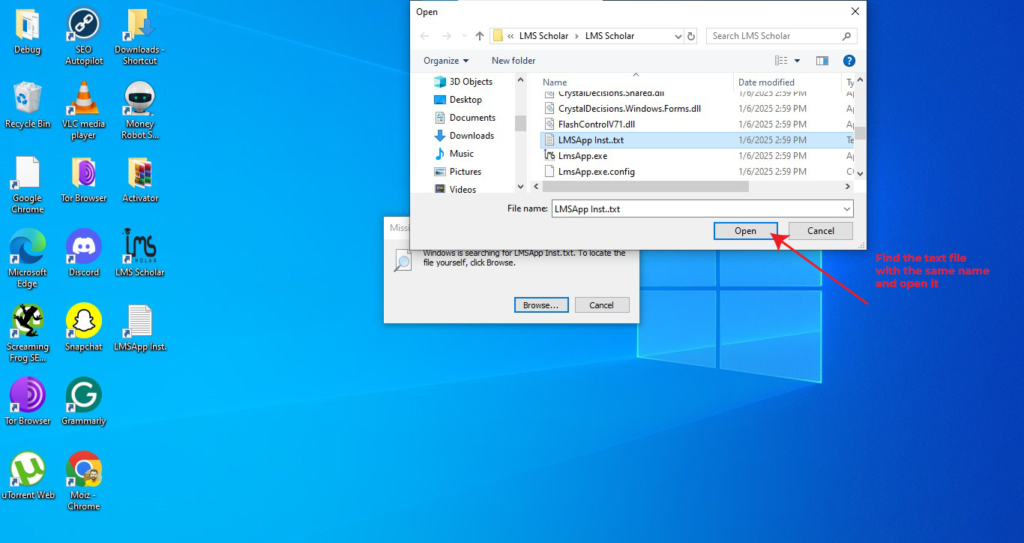
Step 1: Open the Text File and Browse for Prepared File
Start by clicking on the text file provided in your LMS Scholar package. Once you click it, a screen similar to the one shown below will pop up. On this screen, you’ll see an option to Browse – click on it to proceed to the next step.
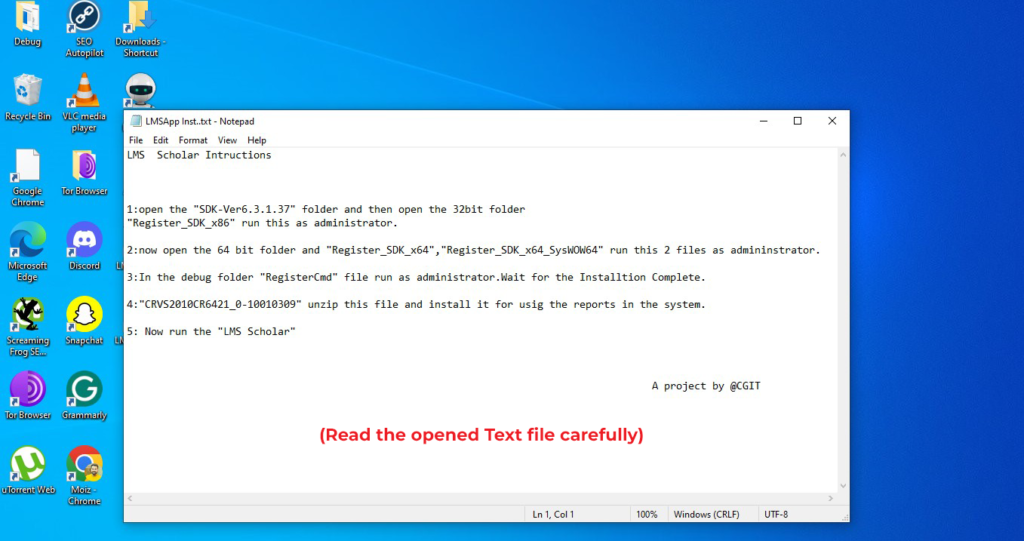
Step 3: Read the Opened Text File Carefully
Once the text file is open, take a moment to read its contents carefully. This file contains important instructions and information required to complete the preparation process for your LMS Scholar. Make sure to follow the guidelines mentioned in the file to avoid any errors in the next steps.
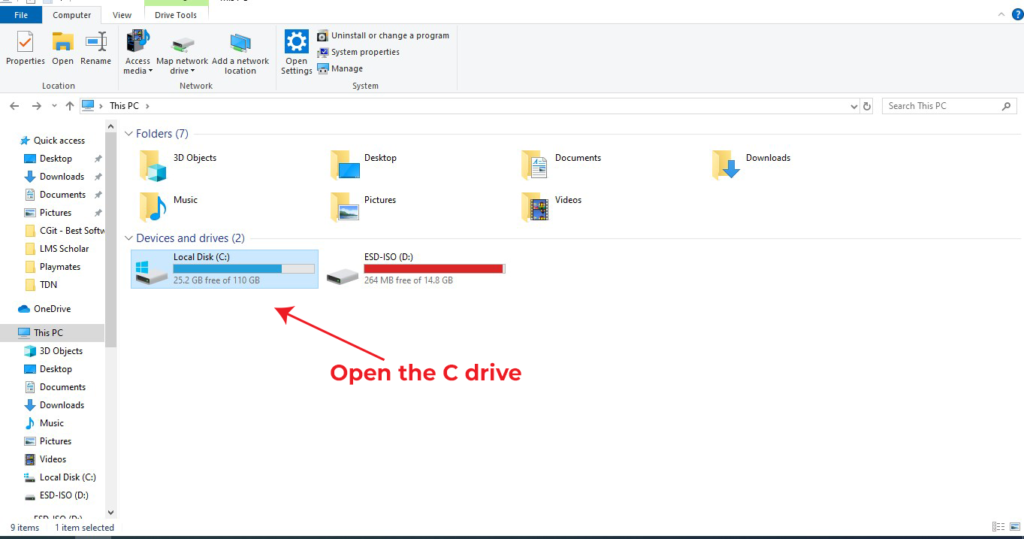
Step 4: Open the C Drive
Now, navigate to your C Drive on your PC. The C Drive is where most system files are stored, and it’s the location where you’ll be preparing your LMS Scholar files. Make sure to locate the correct directory to avoid any confusion in the next steps.
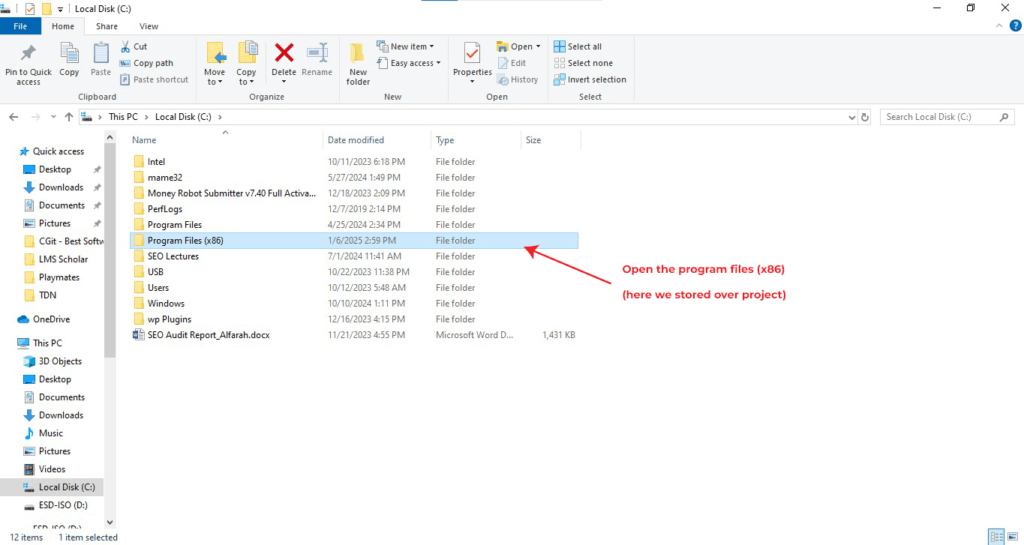
Step 5: Open the Program Files (x86) Folder
After accessing the C Drive, locate and open the Program Files (x86) folder.
This is where your LMS Scholar project files have been stored. Make sure you’re in the correct folder to ensure a smooth preparation process.
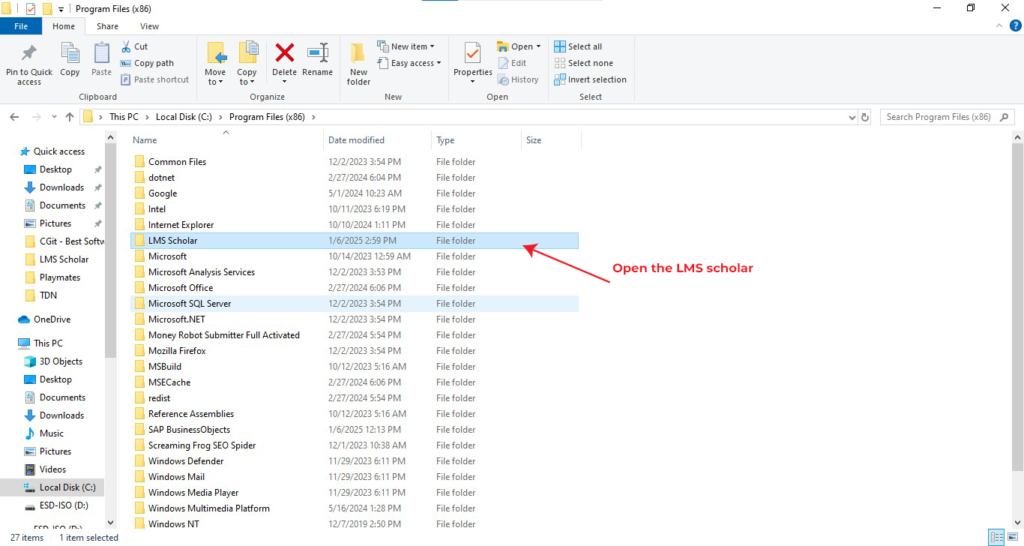
Step 6: Open the LMS Scholar Folder
Inside the Program Files (x86) folder, look for and open the LMS Scholar folder. This is where all the necessary files for the LMS Scholar are stored. Once you’ve opened the folder, you’ll be ready for the next steps in the setup process.
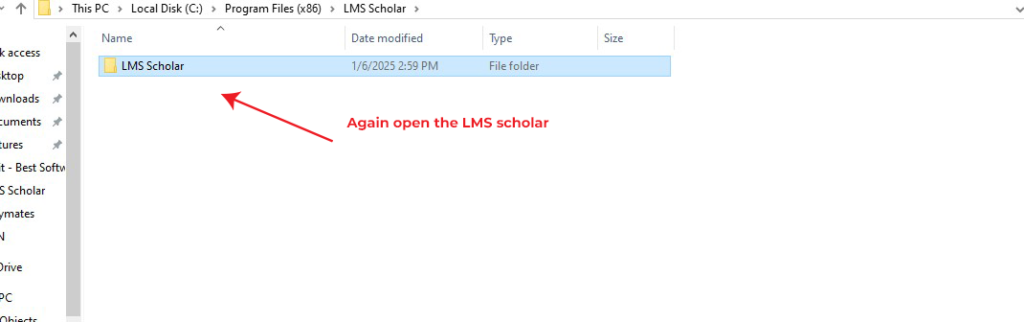
Step 7: Open the LMS Scholar Folder Again and Access the Sub-Files
After opening the LMS Scholar folder, reopen it. Inside the folder, you’ll find various sub-files. These are the files required for the next part of the preparation. Make sure to locate the relevant file you need to proceed.
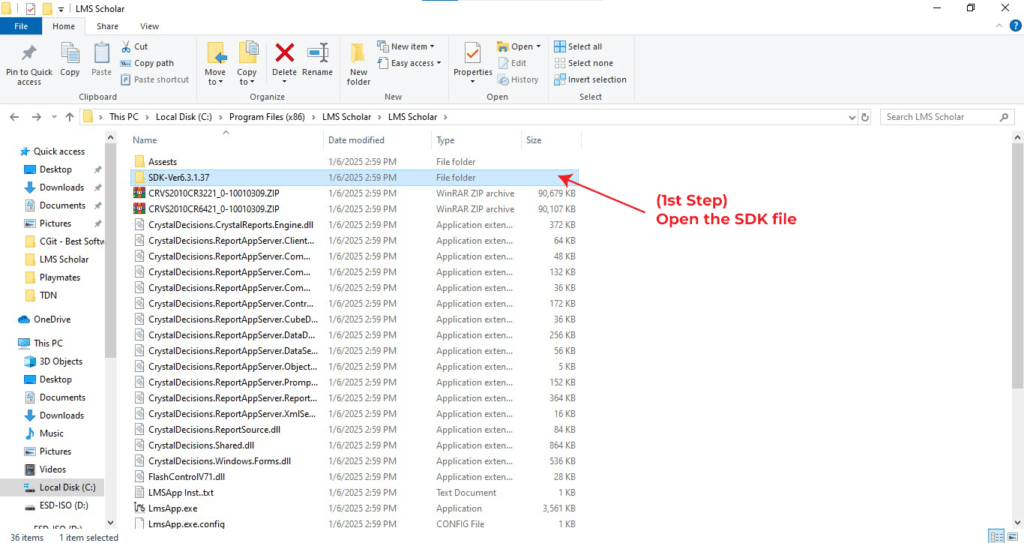
Step 8: Open the SDK File
Now, inside the LMS Scholar folder, locate and open the SDK file. This file contains the necessary components required for the next part of the process. Once the SDK file is opened, you can proceed with the subsequent steps.
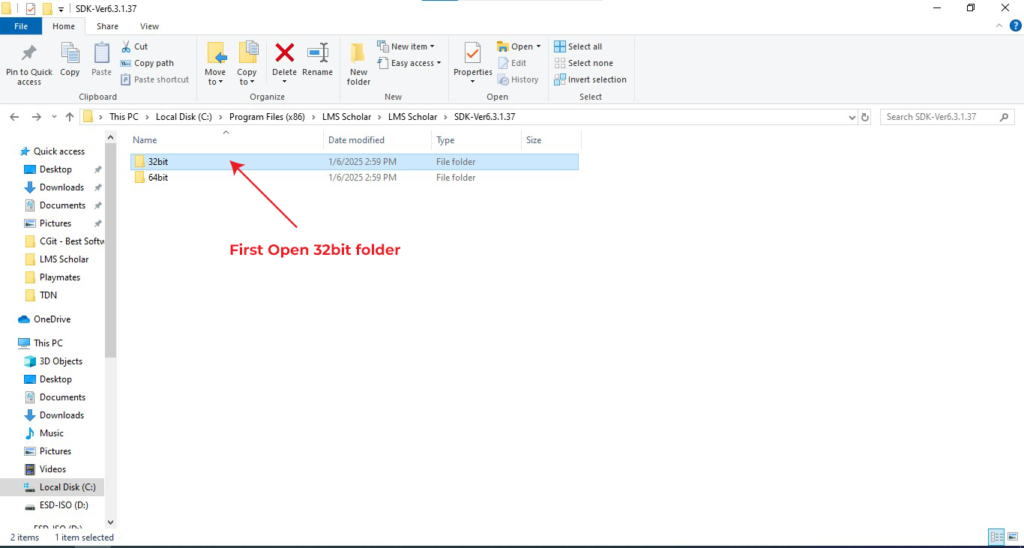
Step 9: First, Open the 32bit Folder
Inside the SDK file, you’ll find a 32bit folder. Open this folder to access the necessary files required for the next steps. This folder contains components specifically for 32-bit systems.
Step 10: Run the Register SDK File as Administrator
Once you are inside the 32bit folder, right-click on the Register SDK file and select Run as Administrator. This will ensure that the necessary permissions are granted for proper configuration. Allow any prompts that appear to complete this process.

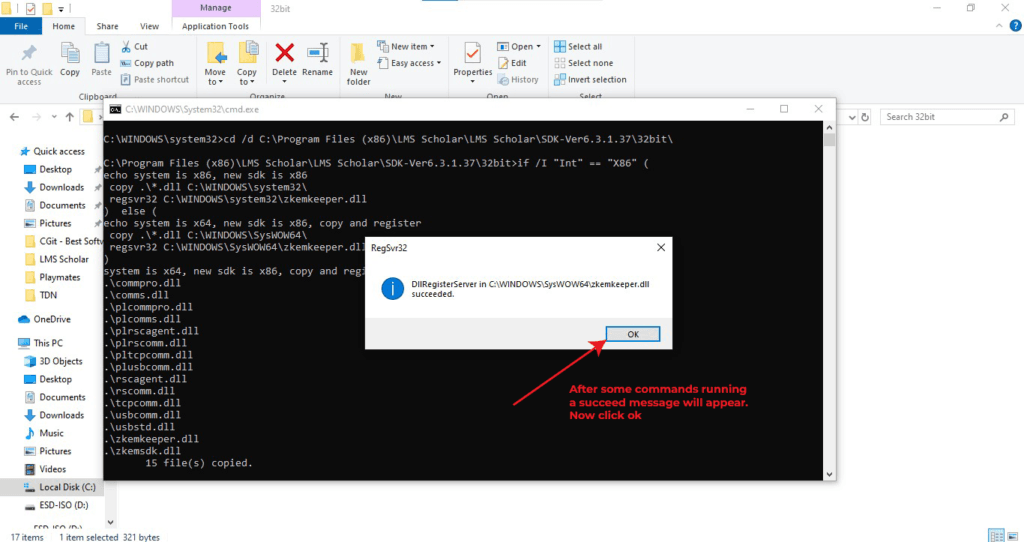
Step 11: Wait for Commands to Run and Click OK
After running the Register SDK file, the system will execute some commands. Once the process is complete, a success message will appear on your screen. Simply click OK to confirm and proceed to the next step.
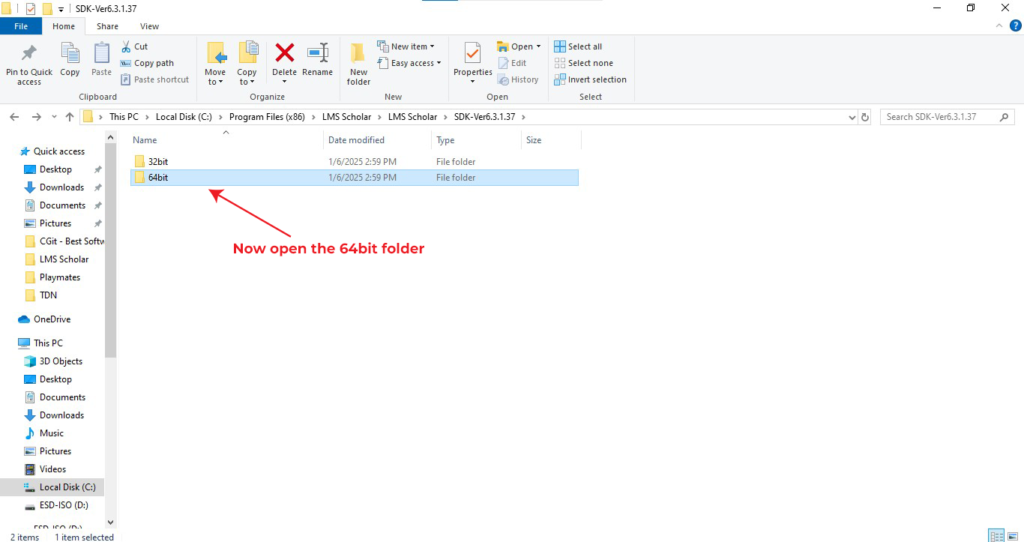
Step 12: Now Open the 64bit Folder
Next, go back to the SDK file and open the 64bit folder. This folder contains the necessary components for 64-bit systems. Access this folder to proceed with the next steps.
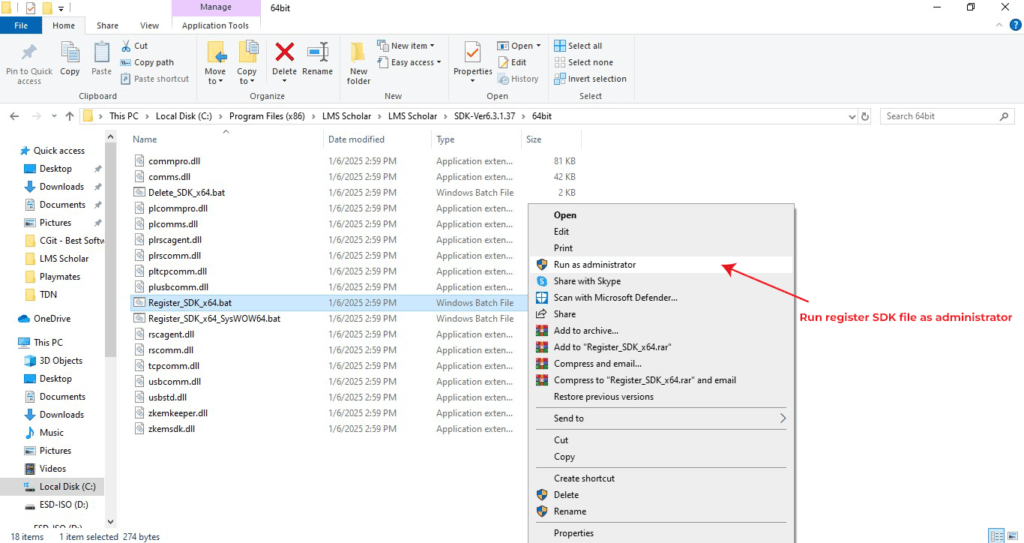
Step 13: Run the Register SDK File as Administrator
Inside the 64 bit folder, right-click on the Register SDK file and select Run as Administrator. This will grant the necessary permissions for the registration process to complete successfully. Allow any prompts that appear to finish the process.
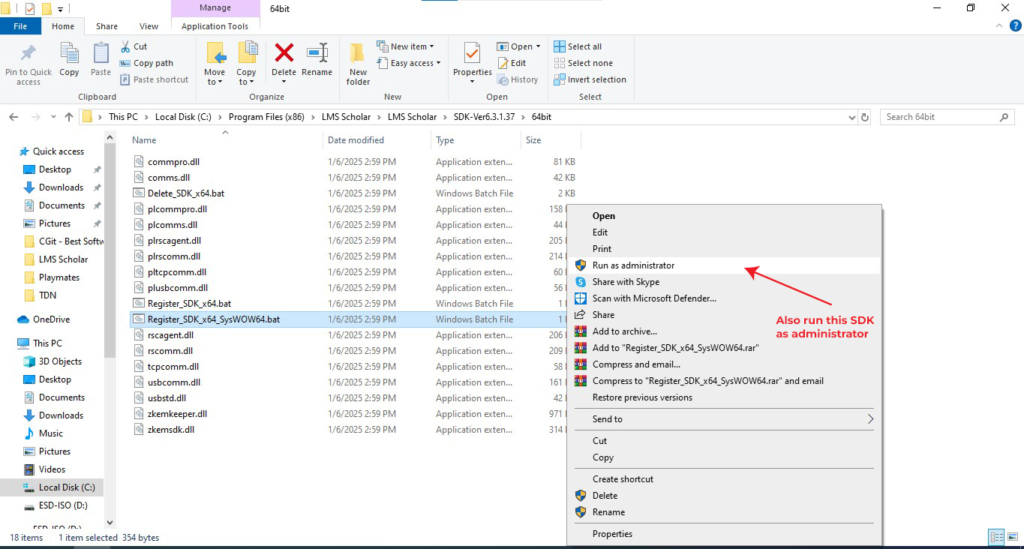
Step 14: Also Run the SDK as Administrator
After running the previous SDK file, make sure to right-click on any remaining SDK files in the 64bit folder and select Run as Administrator for each one. This ensures that all necessary components are registered properly. Allow any prompts that appear during the process to complete the setup.
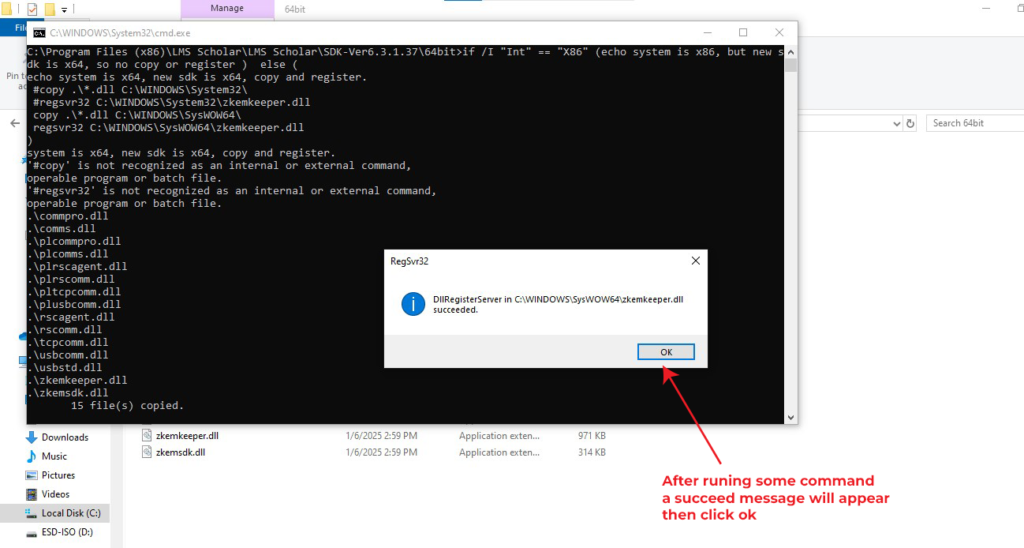
Step 15: Wait for Commands to Run and Click OK
After running the SDK files, the system will execute some commands. Once the process is complete, a success message will appear. Click OK to confirm and proceed with the next steps.
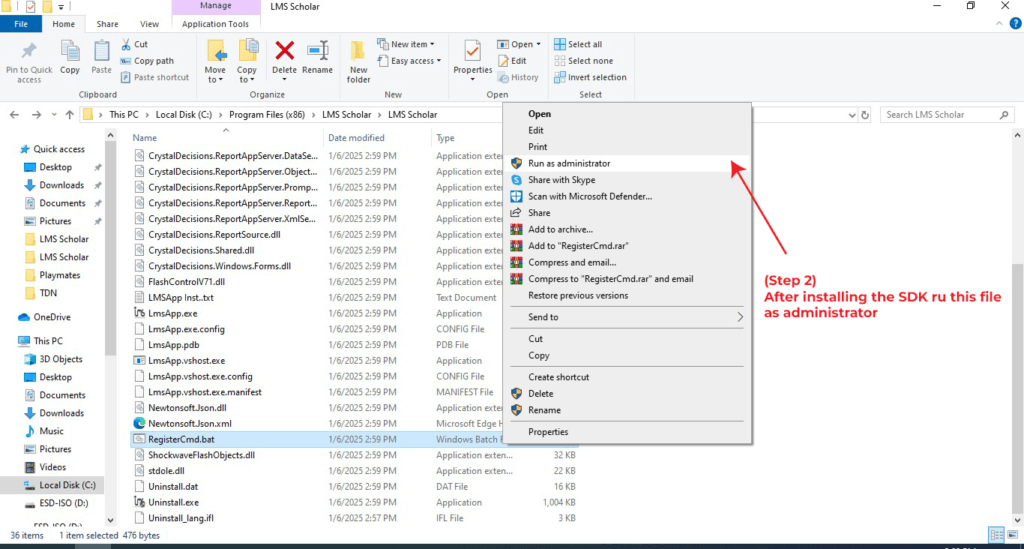
Step 16: After Installing the SDK, Run This File as Administrator
Once the SDK installation is complete, locate the required file and right-click on it. Select Run as Administrator to ensure the proper execution of the file. Allow any prompts to complete the process successfully.
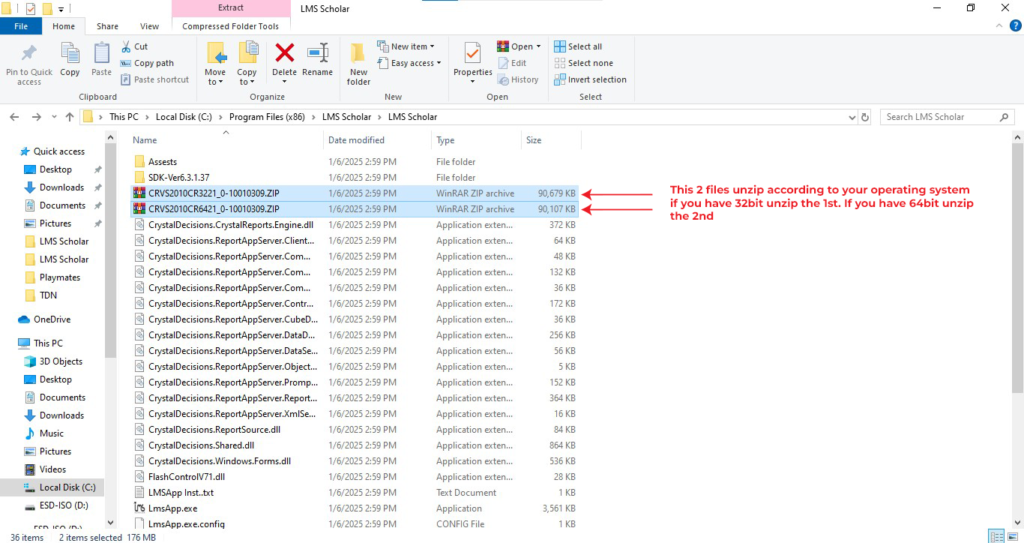
Step 17: Unzip the Files According to Your Operating System
Now, you will need to unzip two files based on your system architecture.
- If you have a 32-bit system, unzip the first file.
- If you have a 64-bit system, unzip the second file.
Make sure to extract the files to the appropriate location based on your operating system.
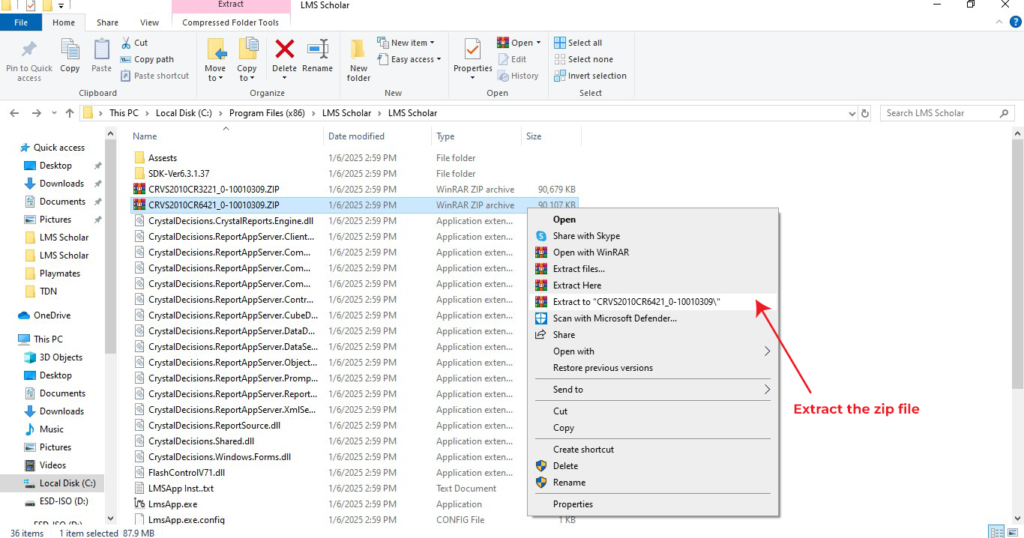
Step 18: Extract the Zip File
After selecting the appropriate file, right-click on the zip file and choose Extract or Extract All. This will unpack the contents of the zip file into a folder where you can access the necessary files.
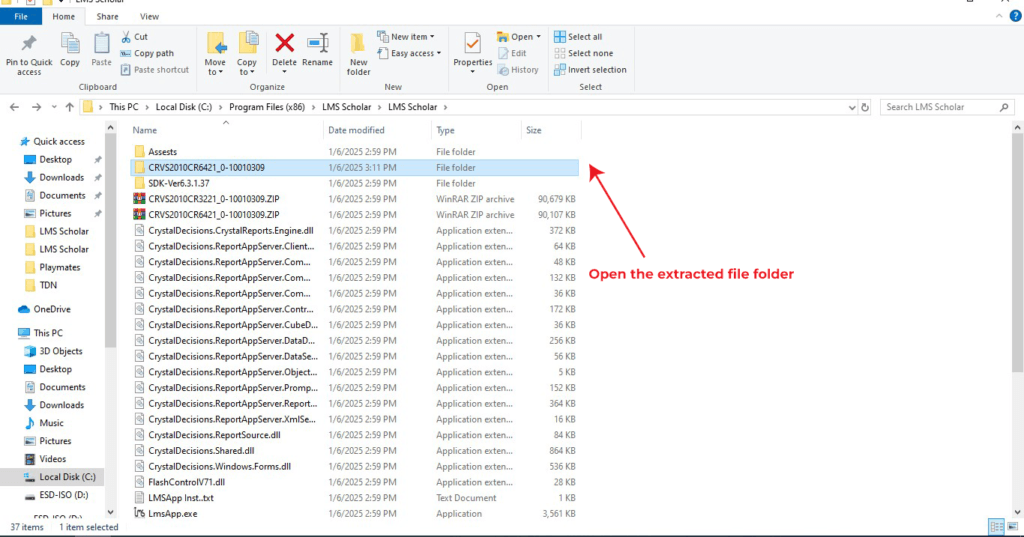
Step 19: Open the Extracted File Folder
Once the zip file has been extracted, open the extracted folder to access the files you just unpacked. This will allow you to continue with the next steps in the process.
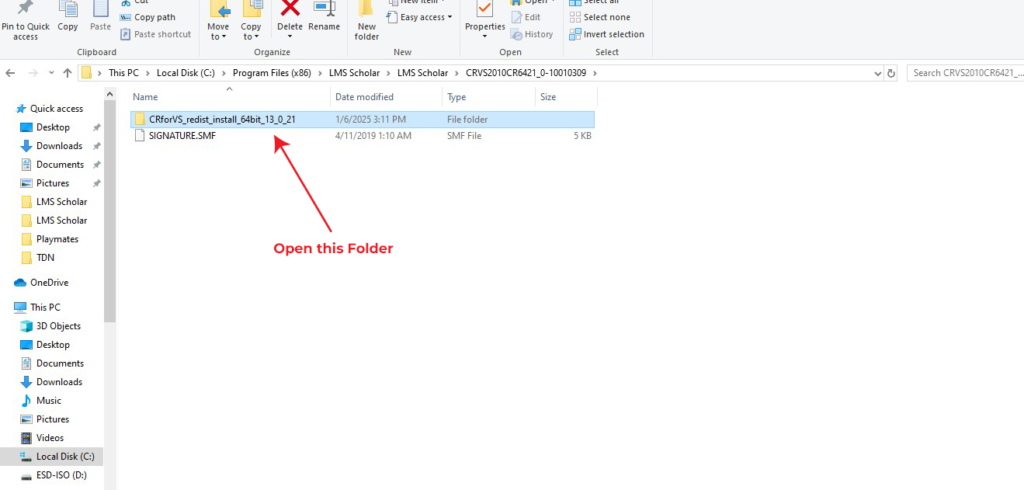
Step 20: Open This Folder
Now, simply open the folder to access the necessary files. This folder contains all the components required for the next steps in the process.
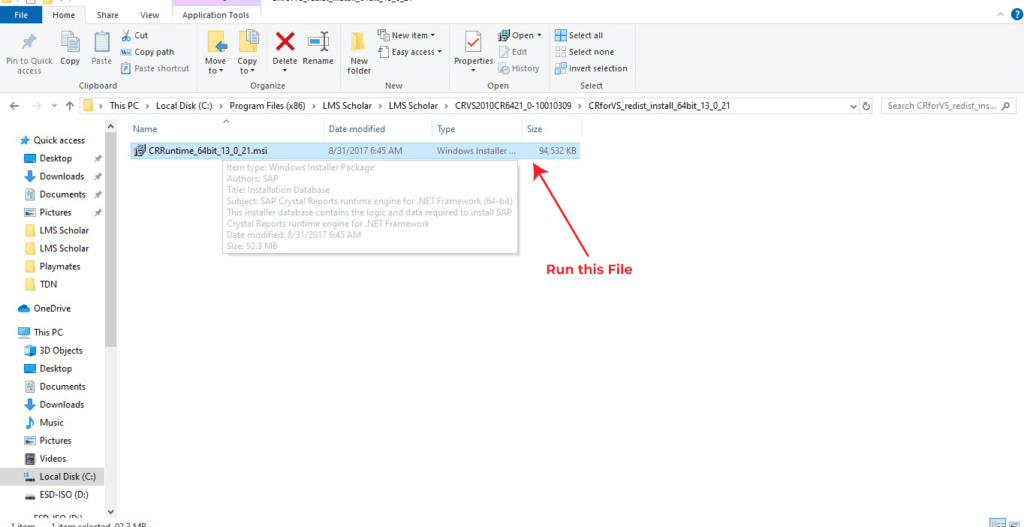
Step 21: Run This File
After opening the folder, right-click on the file and select Run to execute it. This will start the process needed for the next step of your setup.
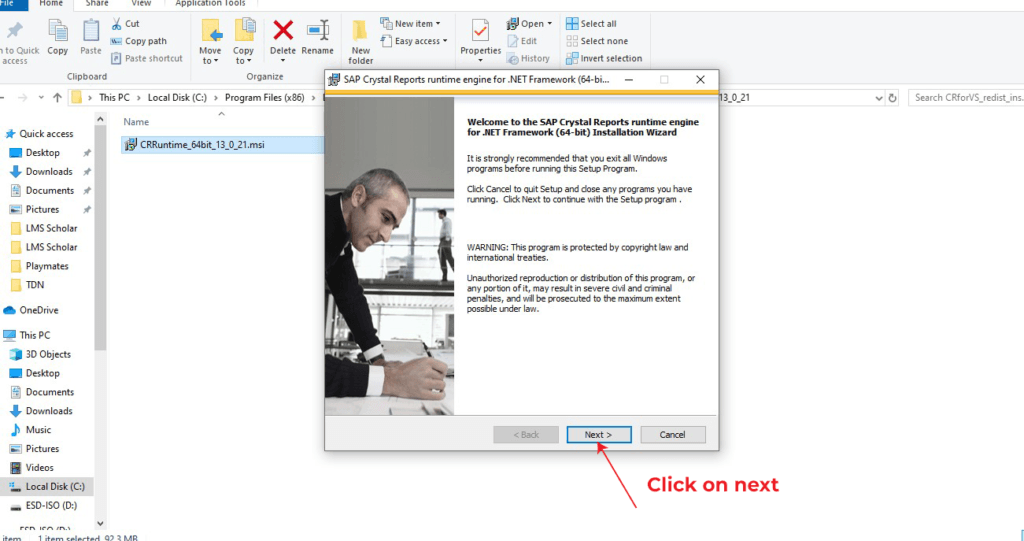
Step 22: Click on Next
Once the file is running, you will be prompted with an installation window. Click on “Next” to proceed with the installation process and follow the on-screen instructions.
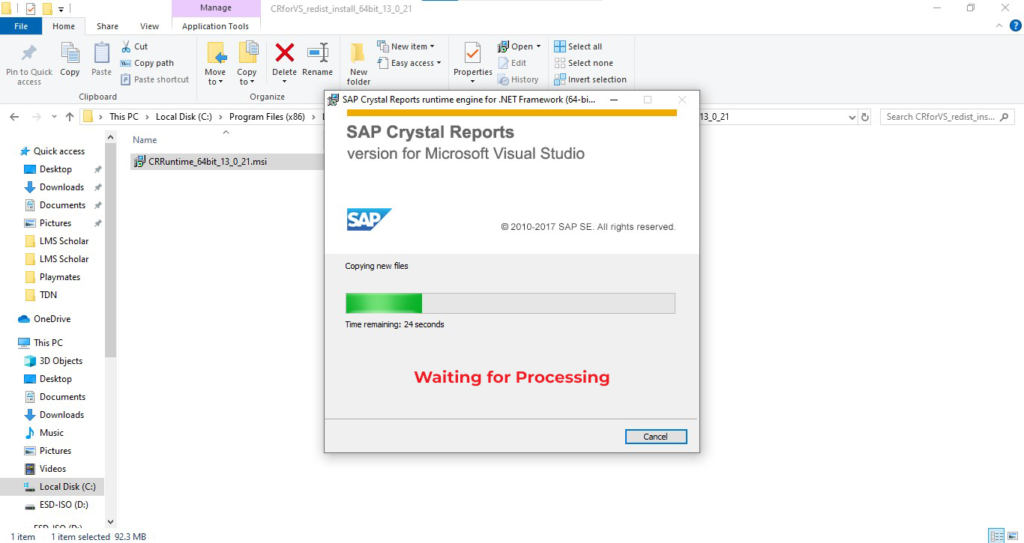
Step 23: Waiting for Processing
At this stage, the system will begin processing. Please wait as the installation or setup continues. This may take a few moments, depending on your system. Once completed, you’ll be directed to the next step.
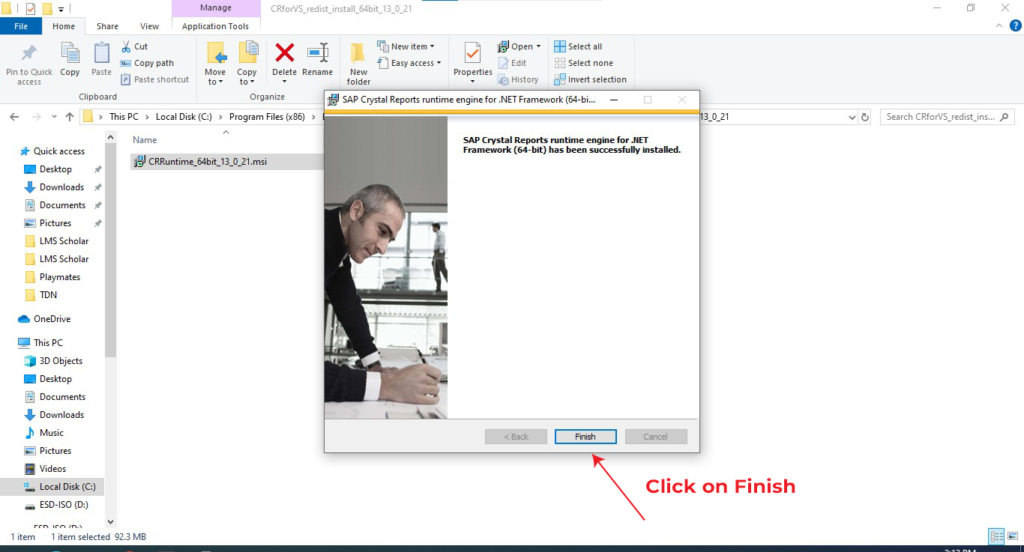
Step 24: Click on Finish
Once the processing is complete, a final prompt will appear. Click on “Finish” to complete the process and close the installation or setup window. You are now ready to move on to the next steps!
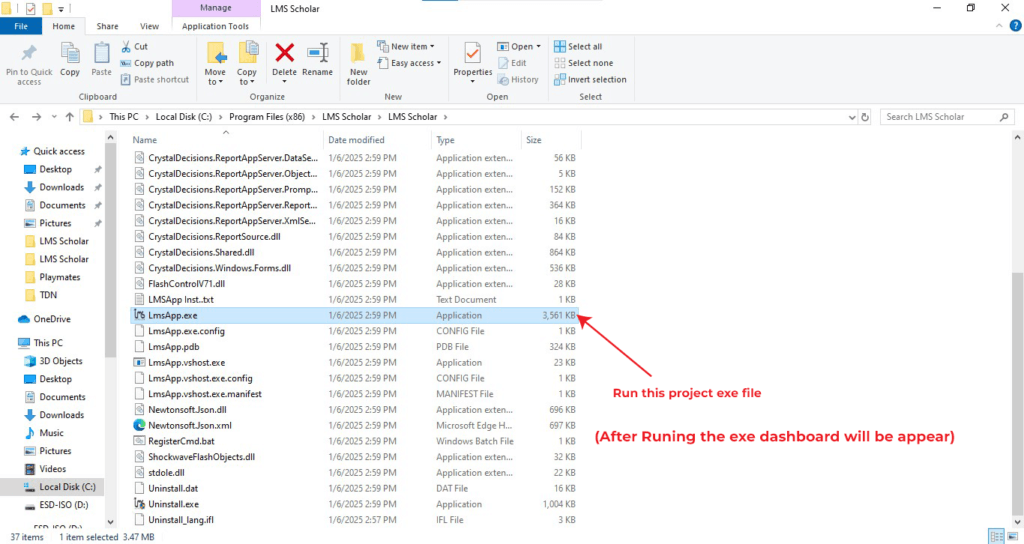
Step 25: Run the Project EXE File
Now, run the project EXE file to initiate the application. After running the EXE, the dashboard will appear, allowing you to access all the necessary features and settings for your project.
You’re All Set! Preparing LMS Scholar
By following these steps, you have successfully prepared and set up your Learning Management System LMS A-Z on your system. With the SDK files installed, necessary components registered, and the project file up and running, you’re now ready to explore all the powerful features that LMS Scholar has to offer. Keep following these instructions to ensure smooth operation and leverage the Learning Management System LMS A-Z platform to its fullest potential.